|
|||||||
 |
 |
||||||
 |
|||||||
 |
|||||||
|
|||||||
|
|
||||||
|
|||||||
|
|||||||
|
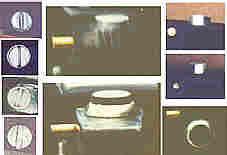
The First Phasers Page 4 Current custom is to leave out tip lights, for example the phaser in "Star Trek - The Search For Spock" had no tip light. Animation is charged by the frame and an actor firing for three seconds is cheaper than a ten second blast, plus he might be aiming it wrong when he does fire or worse, fire at all the wrong times. The problem with animation of the tip light or beans is clearly seen in the episode of "The Enemy Within" when Lt. Sulu has to fire the phaser the warm the rocks. The trouble was as Mr. Sulu fired the phaser he also was moving in back and forth, but the prop rocks were rigged to light up all at once, evenly , so they animated the phaser firing three to six beans to cover up this little discrepancy. It does make for a cute scene. Right below the top cap and to the rear of the muzzle on the left side (your
left if you are holding the weap On some of the "hero" models this knob was hooked to a five position switch and it would snap loudly into each of the five settings. On the dummies most of them were just glued on.
The other two styles of these little side caps are nearly identical. They are the ones made up of three parts. The first is center which was a cut off section from a round aluminum rod (again) with a V cut into one end that had a small hand made bar shaped to make the center knob that sat into the V cut. These were then placed into round tubing and there were two versions, one with thin wall tubing and one with a thicker tubing.
Below this knob we see the trigger. This part was made in many shapes and sizes and placed in several angles. One constant was that all were aluminum. Inside the working models the propmakers had made their own home-grown switch with the aluminum button fastened to a brass bar to give it the spring back ability which, when pressed back, made contact with another brass bar making the electrical connection to light the tip bulb. (I would have bought a pushbutton at the store but back then it is possible that there were few switches small to enough to fit in those tight spaces.) The trigger is mounted in a small housing that seems to have been tacked onto the main body then blended in to both hold the trigger and to allow mounting the handle to the main body. .
Table of Contents1 2 3 4 5 |